HTTPS with custom domains on Azure CDN
My blog is written in Jekyll. Simply put, Jekyll takes documents written in Markdown (similar to what you could use to write README files in a Git repository) and allows you to build that into HTML that any browser can understand. It also allows you to very easily apply a theme on your blog such that with the same content, you could easily change the look of your blog.
On a bit of a tangent, these latest few posts have been written using Emacs' org-mode which you can think of as a special Markdown that Emacs is really good at editing.
Because Jekyll itself is quite flexible, it allows you to sideload pre-generated HTML posts, alongside the normal Markdown ones. So currently I generate my HTML straight out of org-mode and let Jekyll index and display those posts.
Azure then allows you to take a bunch of static HTML files, put them in a storage account, and serve them as a static website. This blog post assumes that that's where you're starting. You have a static website hosted on Azure. And if you don't, the three links below should get you to that point. If they don't, drop me a message and I'll be happy to help.
- Create a storage account that will hold your files.
- Enable the static website feature on Azure.
- Upload the files using something like Microsoft Azure Storage Explorer.
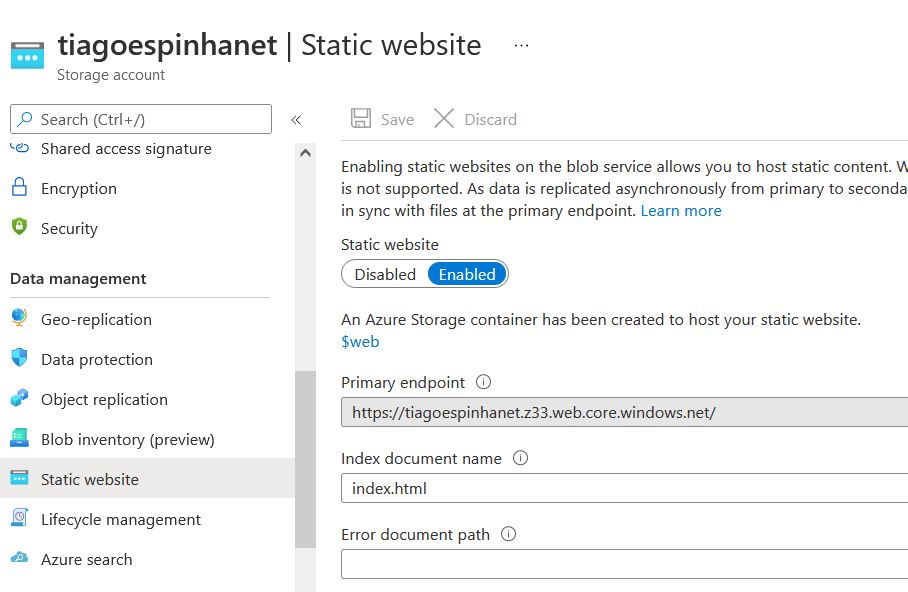
Once you've gone through those steps, you should end up with something similar to this in your storage account:

When you're at this stage, your website is accessible at that Primary endpoint. In this case that is https://tiagoespinhanet.z33.web.core.windows.net/.
That's quite the URL to memorise and to type out every time someone wants to access your blog though!
Not only that, but that URL is region-specific. Because my storage account is in the UK South region, anyone anywhere in the world hitting that endpoint is going to have my blog served off Azure servers located in that UK South region. Works well for me but for someone in Australia, it's going to have less than ideal latency and loading speeds.
A common pattern to deal with this is to use a Content Delivery Network (CDN). The CDN replicates the static content across a network that's distributed across the globe, such that whenever you access the content, you get served by a point of presence that's closest to you.
Azure makes setting this up a trivial matter.
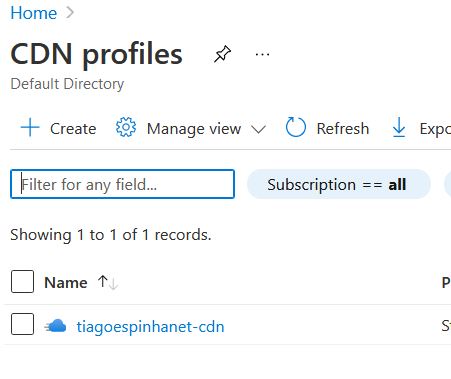
Head over to the CDN profiles in Azure, which takes you to the following page:

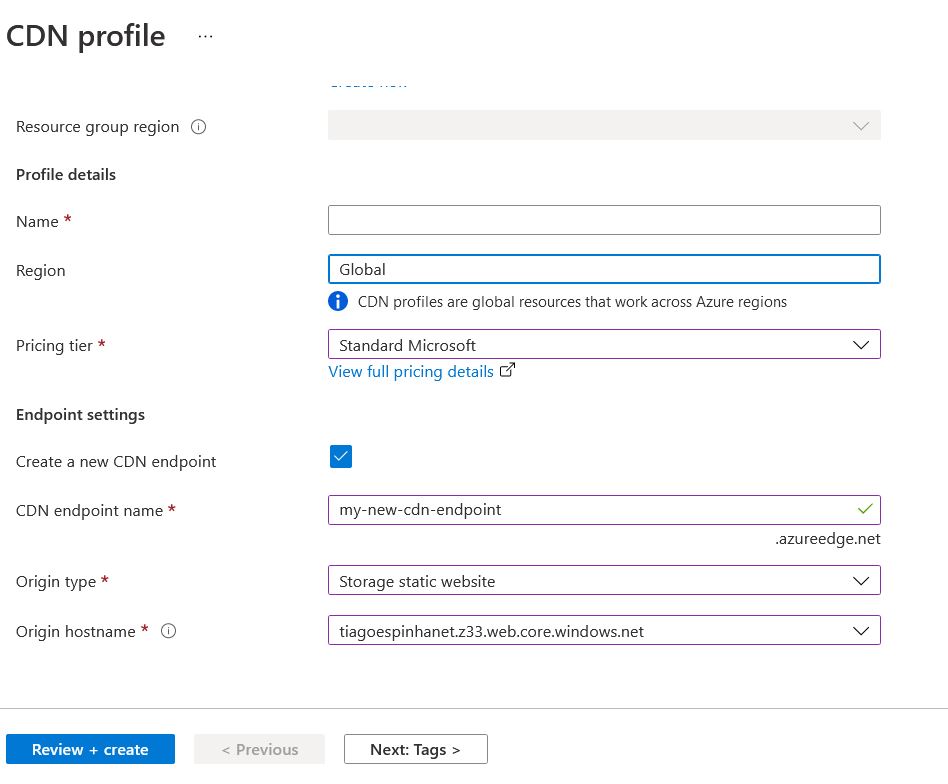
You then Create a new CDN profile which takes you to the following page:

The things to watch out for are:
- Choose the
Pricing tier. There are different tiers, from different vendors, which provide different functionality (a comparison is available if you follow theView full pricing detailslink). TheStandard Microsofttier in particular allows for URL redirect and rewrite, which the Standard Akamai and Verizon tiers don't and is useful for redirecting HTTP to HTTPS. - Tick
Create new CDN endpoint. Assuming this is your first CDN, you need to create a new endpoint that can be used to reach your CDN On. - Give you CDN endpoint a name. This is completely up to you. Your visitors can find out this value if they want, even if you later use a custom domain. So don't use anything that you wouldn't want exposed publicly.
- Pick an Origin type. For this example, pick
Storage static websitesince we're looking to link this CDN with theStorage static websitethat you can create following the steps linked above. - Pick the right
Origin hostnamefrom the drop down box below. It should be showing you all the hostnames you have available as part of storage static websites.

Comments